There are so many ways to edit stop motion. In a pinch, you can even do it on your phone or use an online app such as EZGIF. We're going to discuss other editing options down the line. But for now, we'd like to show you our preferred method of editing our animated frames using Photoshop and Lightroom.

Both Photoshop and Premiere can edit stop motion. But in general, Photoshop is better for editing images individually, while Premiere is great at editing video and sound clips. In our case, we use these apps together to get the best results.
The tutorial below details our preferred editing workflow for editing in Photoshop and Premiere. But once you become familiar with the process, feel free to develop a method that works best for you.
Part I: Adobe Photoshop
We work in Photoshop for the first part of our stop motion editing process. We use it extensively for retouching frames individually and color-correcting the files in batches. It's also the best option to combine our animated frames to create GIF files.
Photo Editing
When we say photo editing, we mean working with frames individually. It solves many issues that would otherwise be challenging to do in Premiere, such as removing blemishes and even erasing rigs in select animated frames.
Step 1: Remove Blemishes in Individual Images
Once Photoshop loads, click Open.
When the dialog box appears, select the image you want to edit and click Open again to send your file to the main Photoshop interface. At this point, you can start editing your file like you would a regular image.
At this point, we use Spot Healing Brush Tool or Patch Tool to remove small blemishes in individual frames.
If we need to remove blemishes in multiple images, we use Batch Edit instead which you will learn next.
Step 2: Export Images
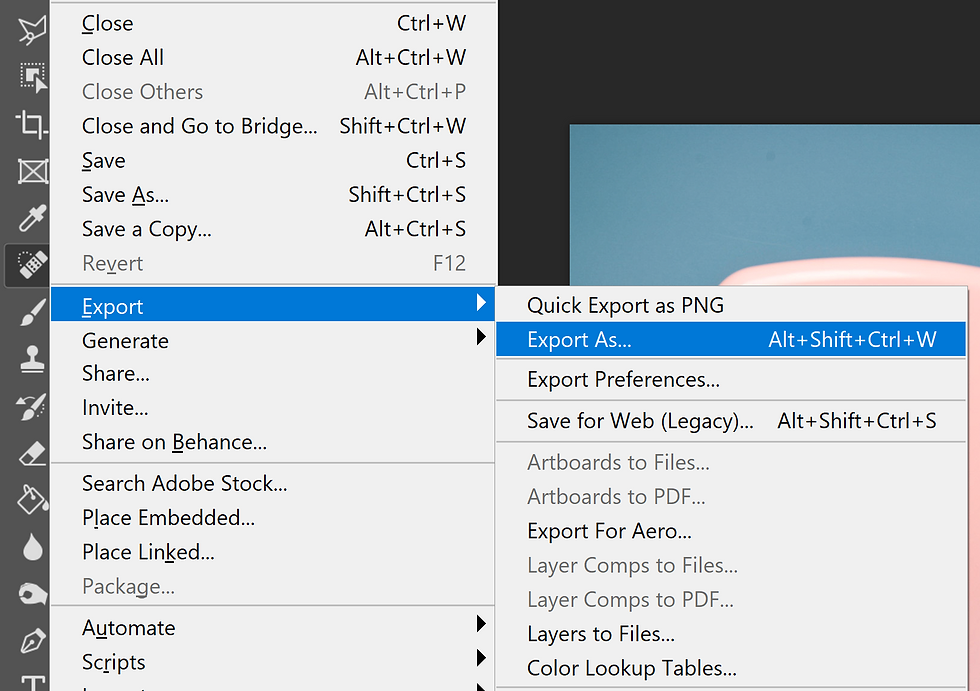
After editing your File, click File> Export > Export As. Once a new window opens, choose JPG as your format, click Export to name, and save your image.
Batch Editing
Editing your files individually will cost you a lot of time. Not to mention that you may end up with discrepancies between frames (i.e., one image may be brighter than the other, etc.) So if you need to tweak multiple files, batch editing is your best choice. It allows you to edit all your files at the same time.
Step 1: Select Images
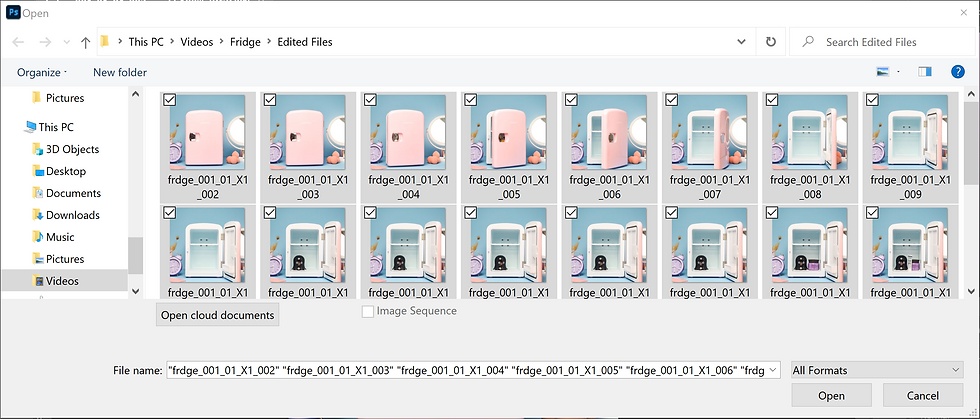
Click Open, and as soon as a new window opens, look for your animated frames. Press Ctrl + A to select them all, and click Open again.

After you click Open, Photoshop automatically opens Adobe RAW, which allows you to Batch-Edit your images [Note: Adobe RAW only opens RAW files and not JPEGs, so make sure you use RAW when animating].
Click on the first file you want to animate, then press CTRL+A to select all the frames.
Step 2: Edit Multiple Files
At this point, you can now adjust all the basic exposure settings such as Exposure, Contrast, and Highlights. Photoshop then automatically applies the changes to all your frames.

Adobe RAW also has a Spot Healing Brush Tool you can apply to remove small spots. But use it sparingly because it's not too accurate.
Step 3: Save Images
Click the Convert and Save Image icon at the top right corner of Adobe RAW. Once the Save window opens, click Select Folder and choose the new destination where you want to save your edited files.

Make sure the Format is JPEG, and the quality is Maximum. Once you confirm all the parameters you set, click Save.
Converting Images to GIF or Video
Technically, you can just load all your frames in Adobe Premiere and convert them into Video. But it's not the best tool for creating GIF files so we don't use it at all for that purpose.
Instead, we combine our animated frames in Photoshop. Using it lets us seamlessly convert our files into GIFs and MP4 video clips without opening Premiere at all.
Keep in mind that the techniques of animating with Photoshop vary. But the tutorial below is the method we regularly use.
Step 1: Load Your Images
First, click Open in Photoshop.

Once a new window opens, select the image file you want to be the FIRST FRAME of your animation, then click Open again.
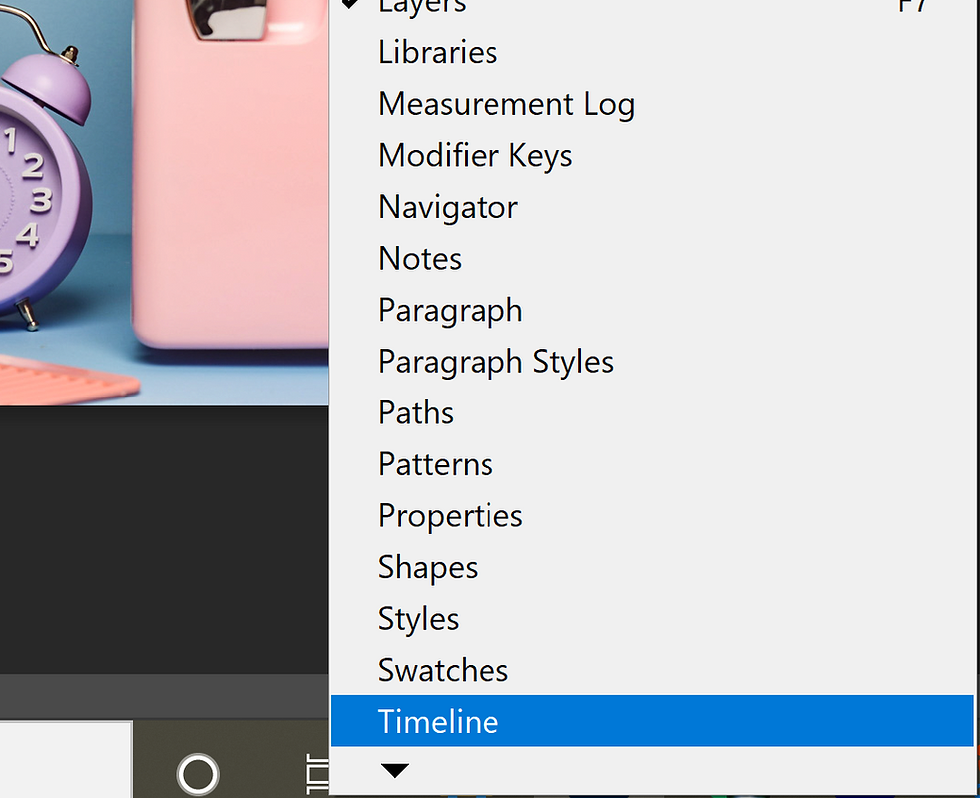
In the Menu Bar, click Window. Then scroll down and select Timeline.
Step 2: Add Media
Once the Timeline appears at the bottom of Photoshop, click Create Video Timeline.
Click the Film Strip icon on the left side of the timeline and click Add Media.

Once a new window pops up, select all the other image files EXCEPT the first image you loaded into PS earlier. After you finish your selection, click OPEN.
Step 3: Change The Delay Time
Once the files you selected appear in the timeline, click the icon with three tiny windows at the bottom left part of the timeline.
Once you click the icon, you'll see the frames transform into small thumbnails.

Click the icon with four lines at the top right of the timeline, then choose Select All Frames.

Click on the Delay Time on one of the frames and select anything between No Delay to 0.2 seconds. We usually choose 0.1 seconds since it matches our 12 fps frame rate.
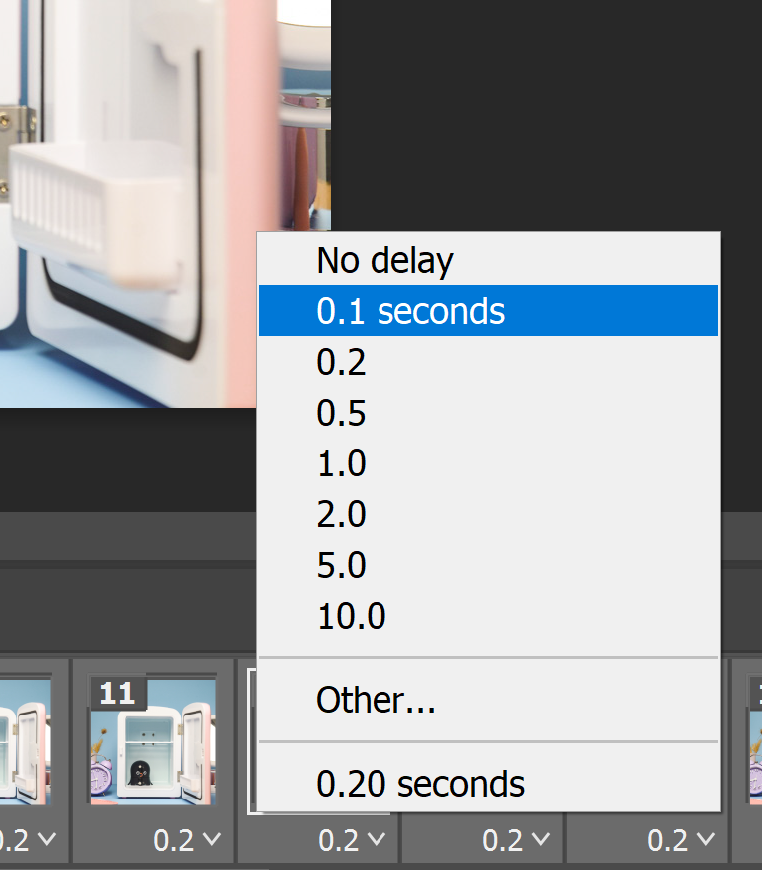
Since you selected all the frames in your Timeline, whatever adjustment you make on the individual image you chose to edit will apply to the rest.
Note that if you click on the thumbnail instead of the Delay Time, you'll essentially deselect the other files. So make sure you click on the Delay Time at the bottom of the frame!
Step 4: Adjusting Playback
Now, it's time to set the playback parameters of your GIF. Next to the Convert to Video Timeline icon, select the playback to be Once, 3 times, or Forever.
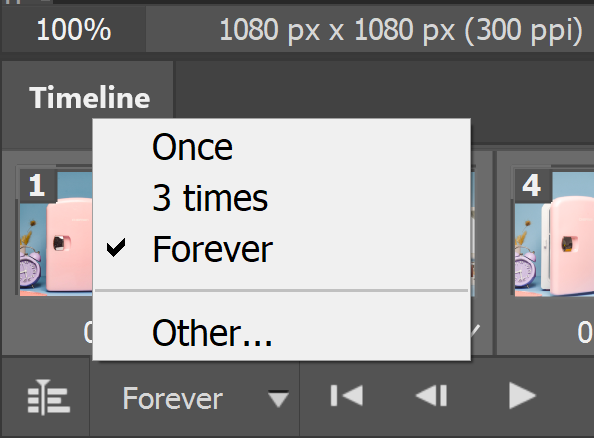
We typically choose Forever because we want our GIF to play in a loop infinitely. Just remember that this option ONLY applies if you're converting your animation to GIF. It doesn't
work if you save your sequence as a video file.
Step 5: Review Animation
At the bottom left of the screen, hit the Play button to preview your animation. At this point, feel free to select all the frames again and readjust your Delay Time if you don't feel it's at the correct speed.

Step 6: Save Animation
Once you're satisfied with your animation, it's time to save your File.
To create a GIF, go to File> Export > Save For Web (Legacy).

Before you hit Save, look at Your GIF's file size below your animation thumbnail. Make sure it's 25MB or below so you wouldn't have problems loading your animation online.
If your file is above 25MB, go to Image Size at the right side of the panel and adjust your File's percentage. From 100%, you can go down to 80% and recheck the file size. If it's still above 25MB, keep lowering the percentage until you're below that value.
If you want to create a video, click File> Export > Render Video. Make sure the format is H264, and the preset is High Quality.
For the Frame Rate, you can type 30, 24, or 12fps. In our case, we usually use 30. Although we sometimes use 24fps if our animation appears sped up.
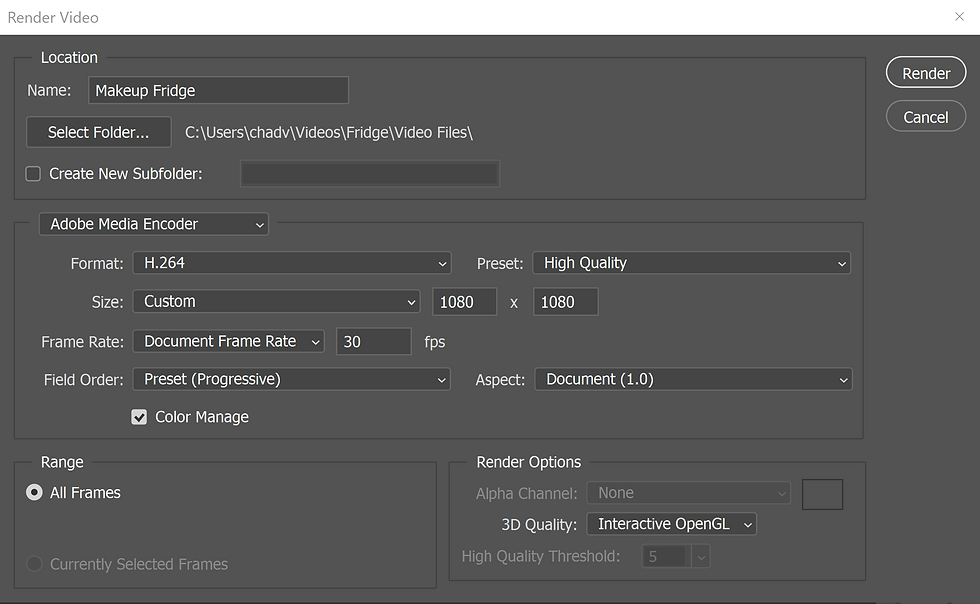
As for the Size, you can use 1080x1080 for square files and 1920x1080 for a cinematic aspect ratio. If you want to create a version for Tiktok, the values would be 1080x1920.
After setting your Size, click Render, and your video should be ready in a few moments!
Part II: Adobe Premiere
In most cases, we transfer the MP4 files we created with Photoshop to Premiere for further editing. But there are also times when we load the individual frames within Adobe Premiere and edit our animation within that app. We'll show you both methods so you can choose the option you think is the best for you!
Editing MP4 Files from Photoshop
The reason why we import MP4 files from Photoshop to Premiere is that it's more convenient to do.
Let us explain:
Since we need to create GIFs with Photoshop anyway, we also often end up exporting the same sequence as a video file within Photoshop. After all, if we don't need to add audio to our animation, then our little stop motion clip is done--no Premiere necessary!
But if we need to add sound effects to our files, that's when Premiere becomes necessary. Why? Because it has the crucial tools for editing audio that Photoshop doesn't have.
Step 1: Create New Project
Once Premiere loads, click the New Project button.

As soon as a window opens, type the title of your project and select the location where you want to save your file. Then click Okay to proceed to the Premiere's main interface.
Step 2: Adjust Settings
Once Premiere's editing interface launches, click File> New > Sequence.

When the New Sequence window opens, click Settings at the top of the Window.
Next, go to Editing Mode and select DSLR.

In the Video section under the Editing Mode, you'll find the Aspect Ratio. Here are the values you need to type into the WxH boxes:
Youtube (16:9 aspect ratio) - 1920x1080px
Instagram (1:1 aspect ratio) - 1080 x1080px
Tiktok/IG Reels (9:16 aspect ratio) - 1080x1920px
After entering your aspect ratio, click Save Preset.
Step 3: Load Sequence into Timeline
At this point, all you have to do is drag and drop your video clips into the timeline. You may have to move one of the circles of the timeline toggle bar left or right to magnify your video sequence (shown below).

Step 4: Add Audio
Mark the section where you want to add audio by brushing through the video sequence using the blue indicator (shown below).
Once you find a section that needs audio, KEEP the blue indicator there.
Click on the folder where you store your sound files. Look for the sound effect you want to use, and drag and drop it to the Audio timeline below the video clip.
Make sure that the beginning of your audio file lines up with the blue indicator.

Feel free to drag your audio sequence around within the timeline until the clip is directly under the video section you want to add audio.
Step 5: Editing Audio and Video Sequences
There are times when you may need to exclude a section in your video or audio file. If that's the case, you may need to shorten your chosen sequence until the part you want to remove disappears.
To shorten a video or audio file, place your cursor at the tip of the sequence until it turns into a red bracket (shown below).
Once the red bracket appears, click and drag your mouse until the part in the sequence you want to remove disappears.
If you made a mistake, you can drag the sequence again to lengthen it until the part you accidentally removed reappears.
Step 6: Save Animated Sequence
Press the Play button above the timeline to check your animation. If everything looks smooth, it's time to save your file!
Go to File > Export > Media. Make sure the Format is H264.
Click on the Output name to retitle your file and choose a new destination.

Finally, click Export to save your new movie!
Editing Animated Frames on Premiere
If you don't need to create a GIF version of your animation, we suggest editing your files directly on Premiere instead.
For the most part, this process isn't any different from the first editing method for Premiere we just showed you. However, there are some extra steps you need to take to convert all those images into an editable sequence.
Step 1: Adjust Image Duration
After you open a new project, click on Edit > Preference > Timeline.
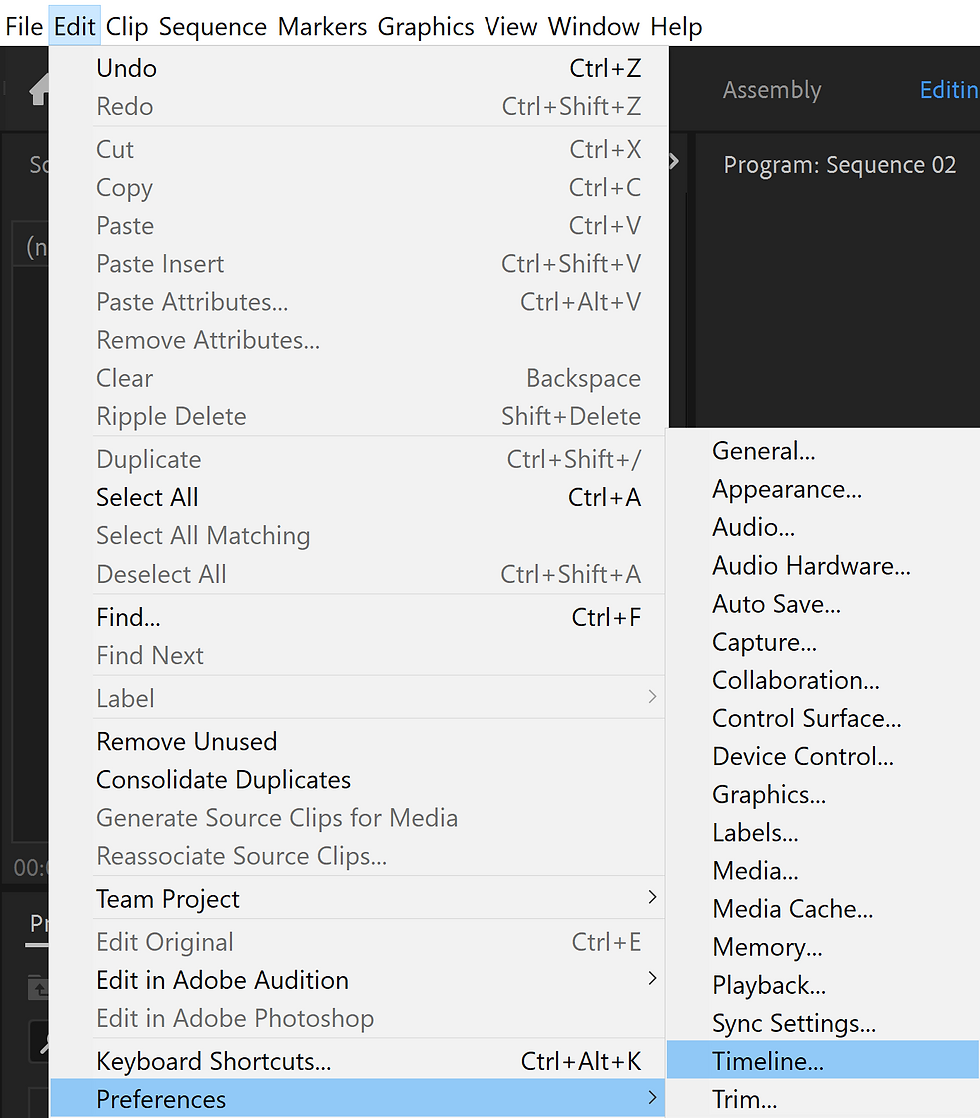
Look for Still Image Default Duration and type 0.10 seconds.
Without leaving the Preferences window, go to Media, select 24fps for Indeterminate Media Timebase, and click Okay.

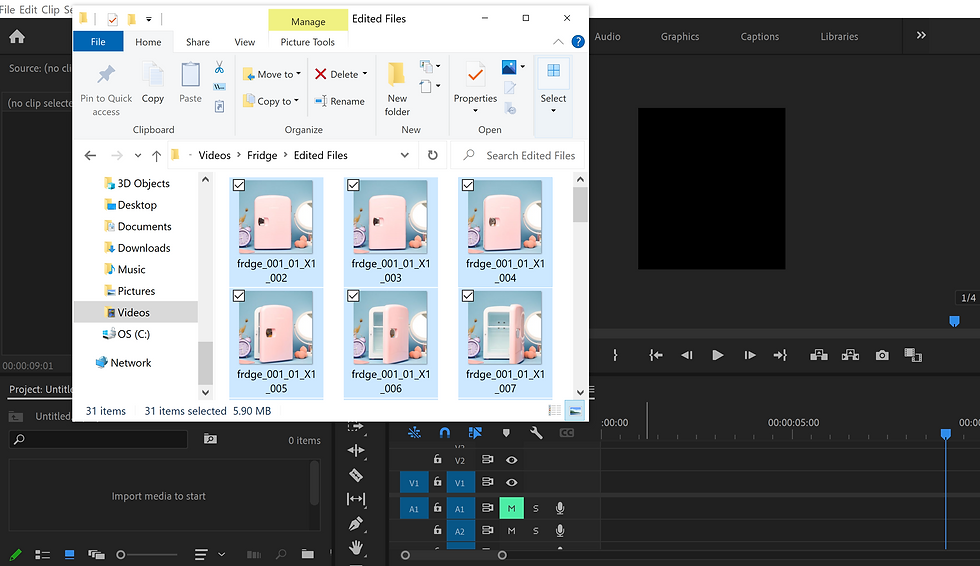
Step 2: Add Frames into Timeline
Once you're back in the editing interface, click the folder that contains all your frames, select them all, and drag and drop them into the timeline.
Step 3: Nest Files
Select all the files by typing CTRL + A, right-click and select Nest. A dialog box will appear asking you to enter a Nested Sequence Name--ignore it and click Okay.

Once you press Okay, Premiere will automatically combine all the individual frames and turn them into a single video sequence you can edit.

At this point, you're free to work with your sequence precisely like the first method for editing animation in Premiere.
Step 4: Save Animated Sequence
Once you finish editing, Go to File > Export > Media. Make sure the Format is H264.
Click on the Output name to retitle your file and choose a new destination.
Finally, click Export to save your new movie!
There are many other tools and features you can use in Photoshop and Premiere that will make your editing workflow easier. But if you're still learning the process, the tools we showed you how to use are all you need to complete your first animation.
We're aware that editing with Photoshop or Premiere could be intimidating at first. But with a bit of patience, you'll find that the process is relatively easy.
It won't take long before you remember all the steps necessary to edit stop motion animation for social media. If you encounter any issues, you can always refer to this tutorial to help you!
In the future, we will be discussing other editing methods including Adobe After Effects!
It's fascinating to see how people have different ways to work and yet, get the same results. I've tried various methods, but currently, I'm editing the photos in LR, then exporting individual frames into PS (from LR) if I need a specific edit that can't be done there, and then exporting everything from LR and creating GIF and video inside PR. Since I begin using PR, I haven't needed to use PS anymore. Once I exported the MP4 directly from dragonframe and edit it in PR, and honestly think that has been the fastest way to edit a stop motion. However, the color correction inside PR is a little bit tricky, in my opinion. I even masked and cleaned everything…